 Penucopia
Penucopia
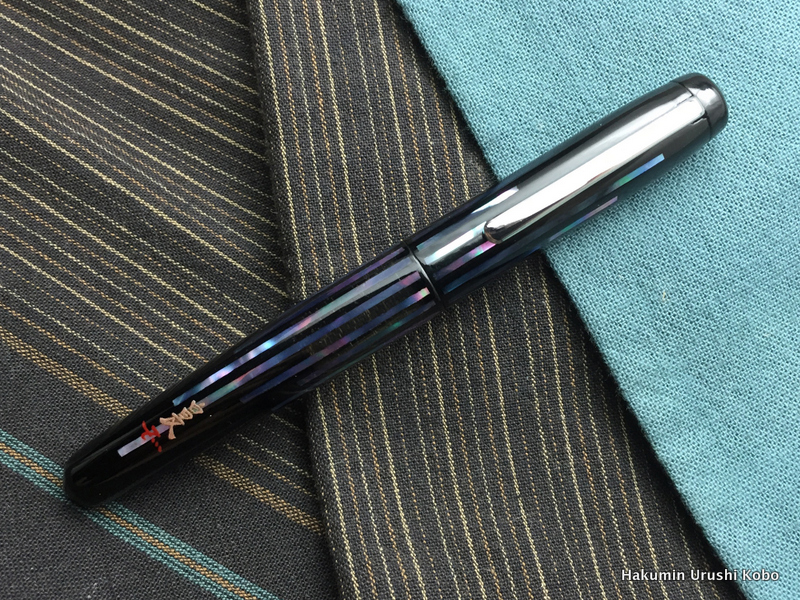 Hakumin Urushi Kobo Raden Edison Pearl - Capped
I have been fortunate to be able to see, try, and own several different pens done in various forms of urushi, including techniques such as maki-e, tamenuri, and raden. But I wanted a particular combination that I had not yet seen done, and I knew who to turn to in order to make it a reality for me. Let’s talk about a special pen that has special meaning to me, and why I didn’t mind waiting almost two years to have it made. Okay, I mostly didn’t mind the wait…
While urushi lacquerware has been produced in Asia for thousands of years, using urushi on pens is a more “modern” concept. Companies that make urushi pens include: Nakaya, Danitrio, Namiki, Pilot, Platinum, Sailor, and many more. Some companies, such as Pelikan, are even making limited edition pens using urushi, including raden. If you want to find out more about the world of urushi and Japanese pens, check out Fountain Pens of Japan, by Andreas Lambrou and Masamichi Sunami.
There are also smaller companies that make urushi pens outside of Japan. Hakumin Urushi Kobo is the one I’m most familiar with because of a partnership with Edison Pen on their Urushi line. Another recent newcomer in the past couple years is Manu Propria Pens. Hakumin Urushi Kobo is based in the US, while Manu Propria Pens is based in Switzerland. Other pen makers also experiment with urushi, so it’s worth exploring pen forums and Instagram to find others doing urushi work.
Having seen Ernest Shin’s (Hakumin Urushi Kobo) work before on Julie Eames’ Mina, I thought that he would be able to rise to the challenge of my design.
(In fact, if you haven’t yet read Julie’s post on Peaceable Writer about her Hakumin Urushi Kobo Mina, go read it first. She gives a lot of great background about the process she went through of having Ernest make her pen.)
Now, before I had Ernest make my raden pen, I wanted to test the waters first. I decided to have him make a pen in a size and shape that I really love with a finish that I also liked. This would let me see if I liked this type of pen in urushi. More importantly, it would let me see if I liked Ernest’s work enough to have him make the pen I really wanted. You see, Ernest can do urushi work on most any pen. He has done work on vintage pens, partners with Edison Pens for their Urushi Line, and has worked with other pen makers as well. So, I set about having Ernest make me an Edison “Skinny” Pearl with an ebonite body in a Kuro Tamenuri finish.
When you purchase a pen from Ernest, you pay him directly for the total cost, including any custom pen work done by a pen maker. He then works with the pen maker to have a “raw” pen as a base for his work. But I wanted to slightly customized pen from Edison, so Ernest and I worked with Brian first to get the base pen to my liking. Brian sent me a “skinny” Edison Pearl in raw ebonite so I could ensure that I had the right pen for me. This also ended up being the base shape that was used on my Double-Ended Edison Pearl.
 Hakumin Pearl Kuro Tamenuri
Ernest delivered the pen to the specifications that I desired, though it did take him several months longer than he had quoted me to complete. Interestingly, I had an allergic reaction to the pen when I first received it. This does rarely happen, but seems to affect those who are allergic to plants similar to poison ivy. Ernest was able to walk me through the process to remove any residual oil from the urushi finish. We noted this for the next time I worked with him, as he could perform additional curing and cleaning to prevent this from occurring. I was very happy with the end result, though, so I decided to go forward working with him on my custom pen.
The reason I spent so much effort into a “trial” pen with Ernest is that I wanted to make the “ultimate” urushi pen for me. You see, I wanted to make a grail pen. Having custom urushi work isn’t cheap, especially when working with delicate materials like raden. I had spent a lot of time thinking about what elements I wanted to include on the pen, and even purchased other pens to determine what I would like.
I wanted to have:
(If you haven’t seen Ernest’s Kyokko pen, go check it out first. It is stunning.)
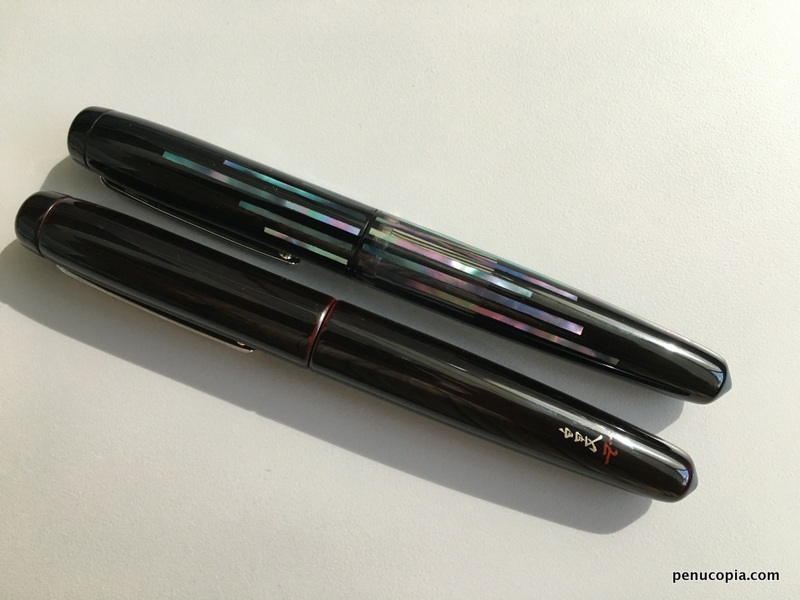
 Hakumin Raden Pearl Design Elements
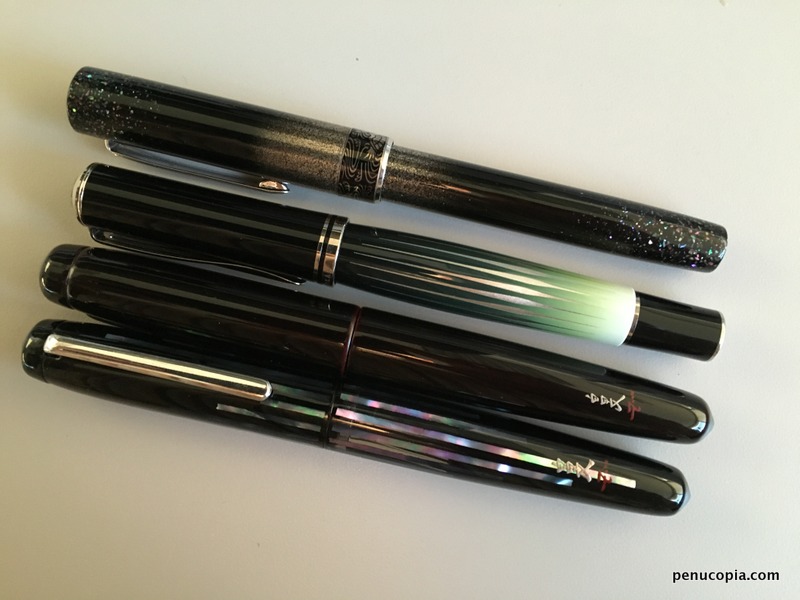
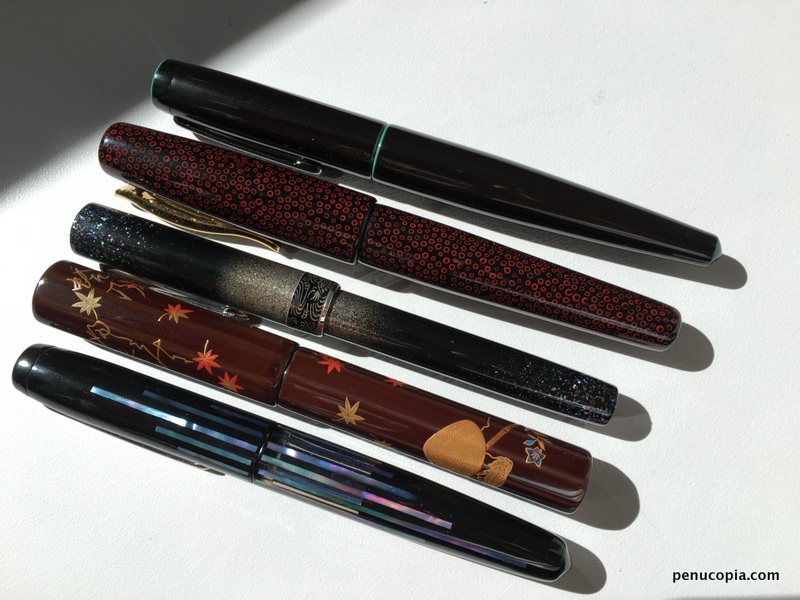
 Hakumin Raden Pearl and Pilot 90th Comparison
In the image above, you have some pens that helped me clarify what I was going for:
Satisfied that I had done enough research and that I liked the various elements, I reached out to Ernest to see if it was possible to do what I wanted.
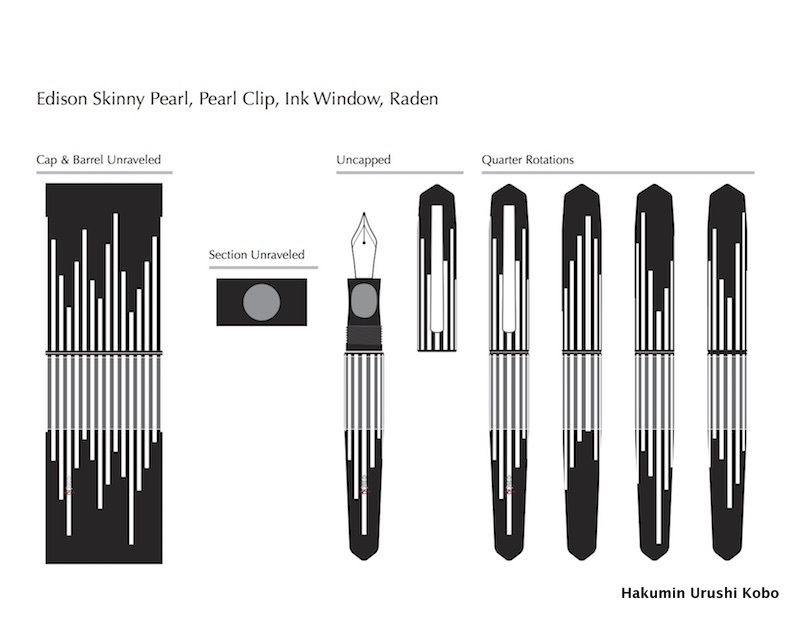
The biggest question, and the reason I went the custom pen route, was to see if I could get an ink window put onto an urushi pen. You see, Nakaya has done something sort of similar with their Skeleton line. They started with a translucent pen barrel, cover it in urushi, and then polish the ends to allow a gentle transition between opaque and see-through. But this isn’t quite the look I was going for. I really love demonstrator barrels, and I thought it would be fun to see ink sloshing around in the barrel between the raden strips. So, I reached out to Ernest, who worked with Brian on an approach.
The concept was to leave the pen barrel walls slightly thicker than normal. Brian was going to make a pen with an ink window, and Ernest was going to hand-carve out channels in the barrel to contain the strips of raden. It was neat that the two of them worked together to come up with a technique to handle my request.
That hurdle crossed, we talked through the rest of the design. No issues with the all acrylic barrel. Ernest suggested that the combination of the ink window, raden, and silver powder would be a lot already and to forego the tamenuri finish. So we went with black urushi instead. I thought that the silver powder would look too busy and compete with raden strips and ink window if simply applied over the whole barrel, so instead I went with a moon on the section in silver powder.
Ernest also gave me several options for types of raden to use. I liked a particular blue/purple/green type of raden from the mother of pearl from the Green Turban Snail. Some detail from Ernest:
The species is Turbo marmoratus, common name, Green Turban Snail or Marmorated Turban Snail, which grows to a rather large, 8-12 inches in diameter. In Japanese, the shell is called yakkou-gai. It’s interesting to note that the portion of the shell that I will be using comes from a rather small portion of the shell which is the only spot that can produce flat pieces of pearl.
The last detail was the use of silver powder. You see, my mother’s name in Chinese means Autumn Moon. My wife’s last name means moonlight. By incorporating a moon on the section, you are surprised by seeing it when you uncap the pen. It also looks like a moon in the sky with the northern lights beaming down from it. I also liked that I could see the moon on the section as I used the pen. This technique is called Togidashi Maki-e and is done with silver powder.
 Hakumin Raden Pearl Mockup
After all the smaller details were ironed out, Ernest made a mockup for my approval. A revision or two later, we ended up the final design. Ernest also let me know that he had come up with a different way to handle attaching the raden to the pen barrel. I liked the newer approach, so we decided to go with it.
This was in April of 2014. I paid for the pen up front, and then the waiting commenced.
Since I knew that I would be documenting the development of this pen, I asked Ernest to take photos throughout the process so I could show a little more about what goes into making a pen like this. Normally he doesn’t do this, so I appreciate that he took the additional effort for us.
Due to the busy summer and pen show season, it took a bit longer to get the base pen created. Brian sent the pen to Ernest in late September 2014.
 Hakumin Raden Pearl - Raw
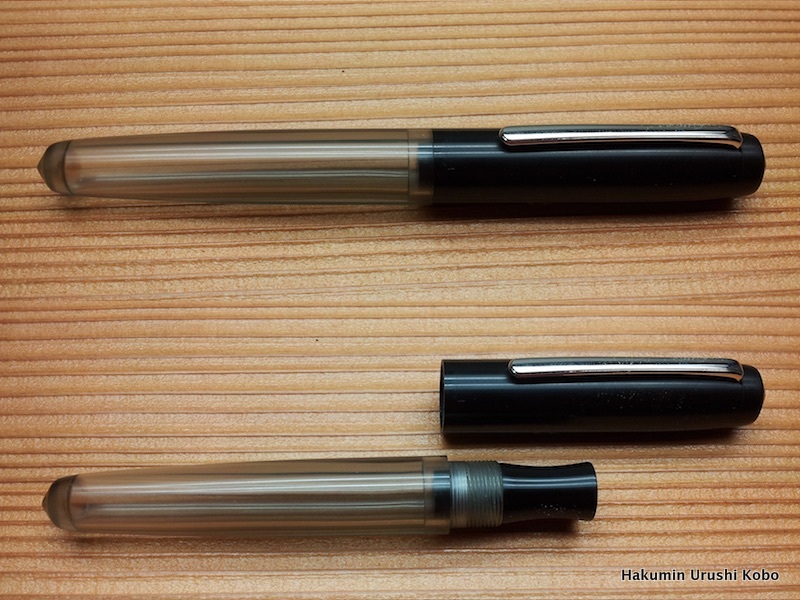
2014-09: The pen started its life as a skinny Pearl with a black acrylic cap and section and a dark gray transparent barrel.
Layers of the base urushi were then applied before the raden strips could be applied.
 Hakumin Raden Pearl - Raden Strips
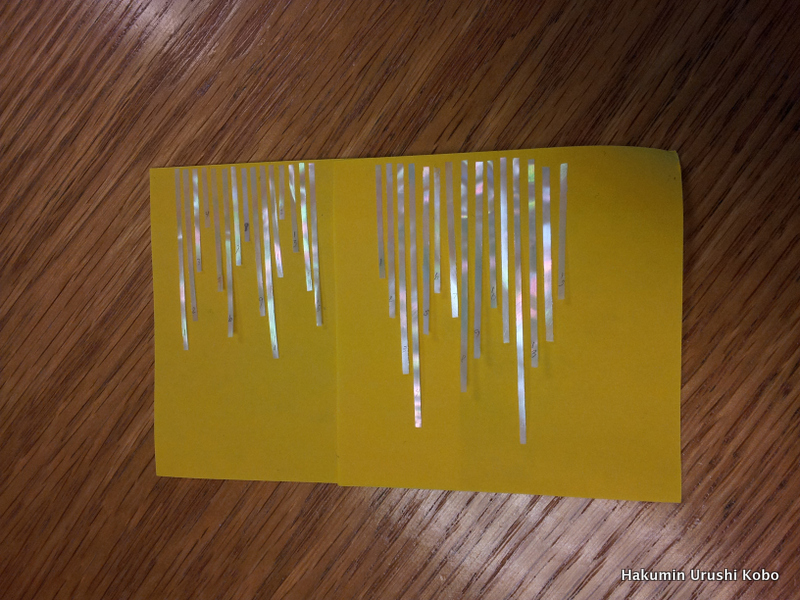
2014-12: Raden strips were then cut, numbered, and prepared for attaching to the pen body.
 Hakumin Raden Pearl - Raden Strips applied
2015-06: The strips of raden are starting to be added to the barrel. This is a delicate process that requires patience and precision, as the strips are very fragile. Layers of urushi are added, then once cured, they are polished and urushi is removed from the raden.
 Hakumin Raden Pearl - Raden Strips almost done
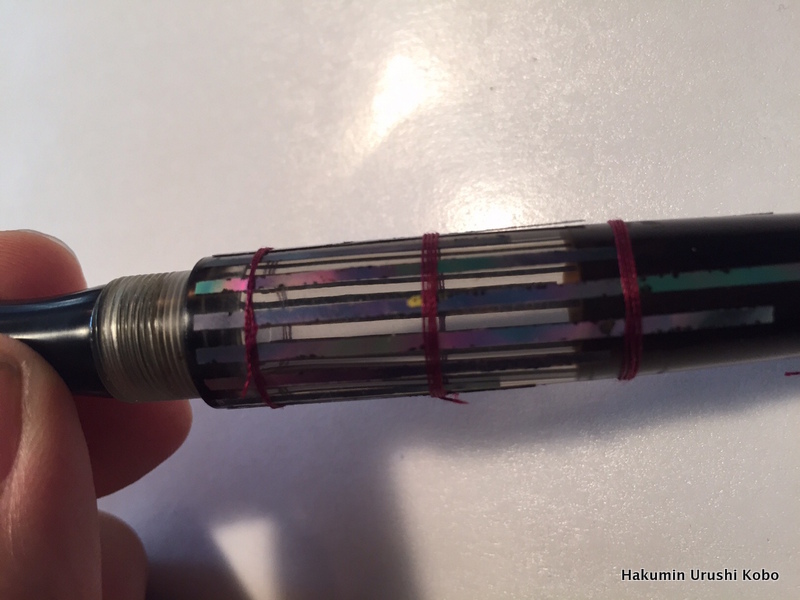
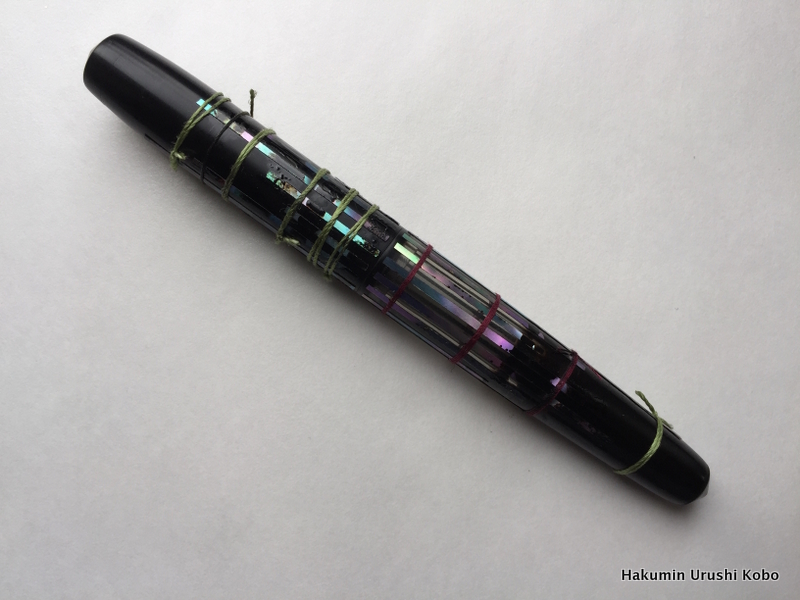
2015-10: The raden strips are almost complete, and the string wrapped around the pen help stabilize them between sessions.
 Hakumin Raden Pearl - Raden Strips attached
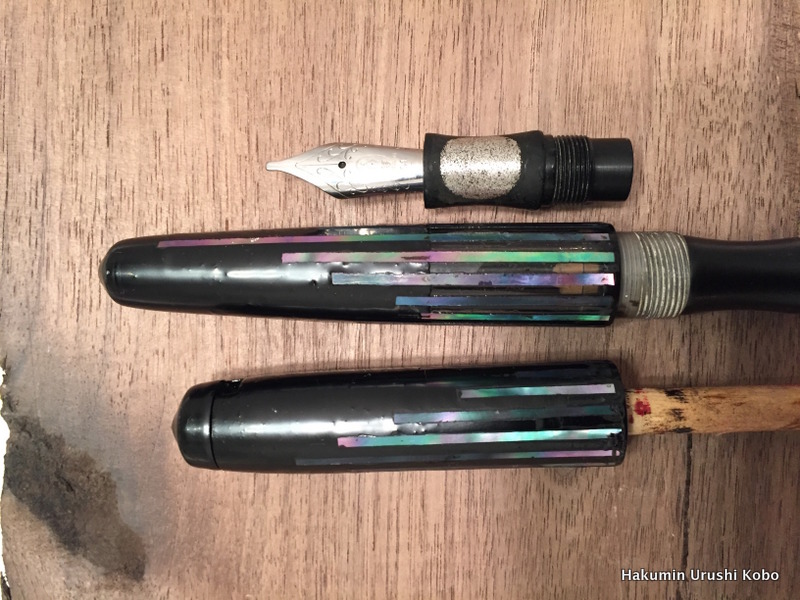
2015-12: In the photo above, the raden is fairly stable now. Notice that parts of the strips are covered by urushi, which must then be removed and polished before more layers are applied. Notice the moon is also on the section, but completely covered in urushi.
 Hakumin Raden Pearl - Final steps
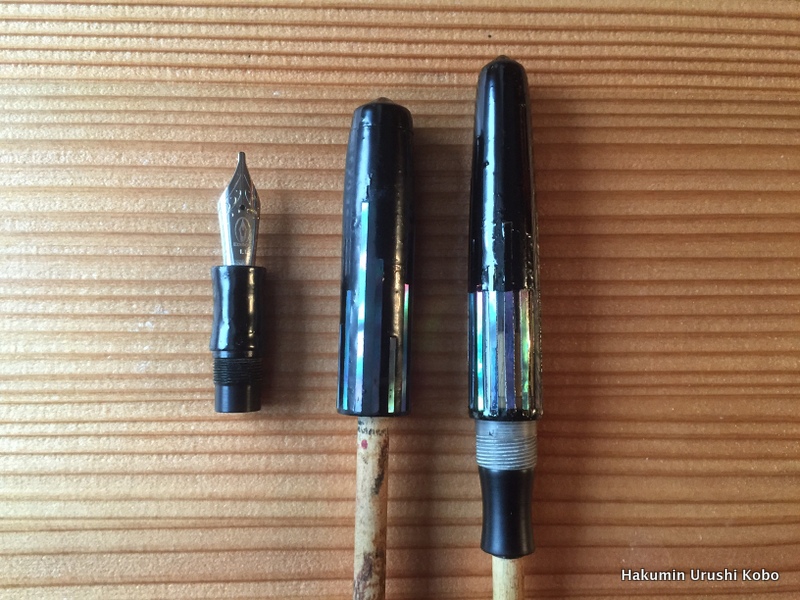
2016-01: The raden is fully attached, and final layers of urushi and polishing occur. The moon is showing on the section, and the raden is in place.
 Hakumin Raden Pearl - Completed - Uncapped
Hakumin Urushi Kobo Raden Edison Pearl - Capped
2016-03: The pen is complete! However, due to my reaction to the urushi, Ernest takes an extra month to cure the pen longer and clean it. Thus begins the most difficult part of the waiting: knowing that the pen is done but I can’t have it.
 Hakumin Raden Pearl - Ink Window focus
2016-04: The pen arrived!
So, how did the pen turn out? I am delighted with it. The pen size and shape is perfect for me. I love writing with it.
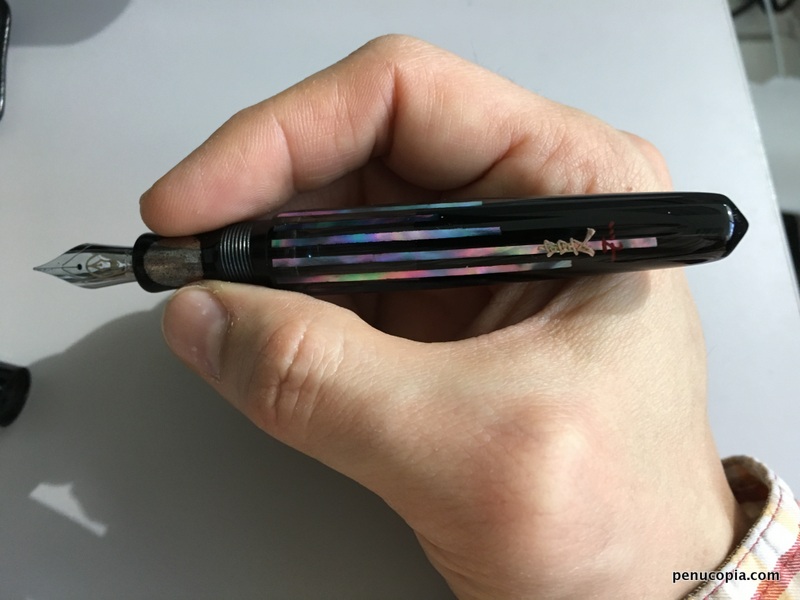 Hakumin Raden Pearl - in hand
So, how does the ink window look and the raden look on the pen? This video does a better job of showcasing it than I ever could.
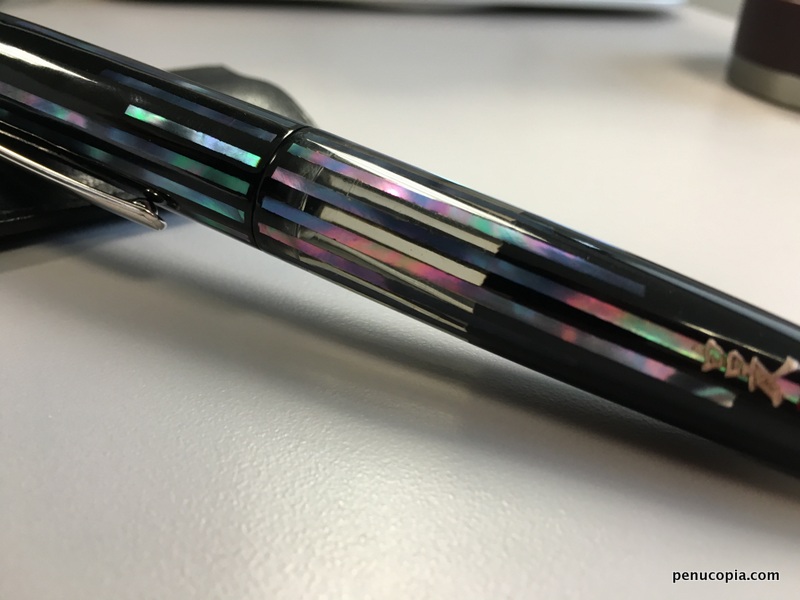
I really love how different lighting causes the raden strips to reflect different colors. It’s quite stunning to see.
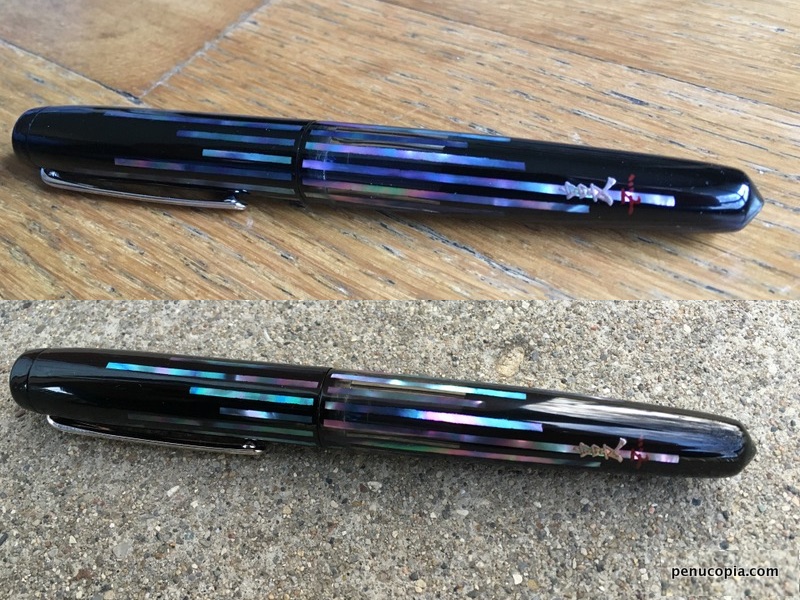 Hakumin Raden Pearl - Lighting comparison
The ink window, raden, and the moon turned out great!
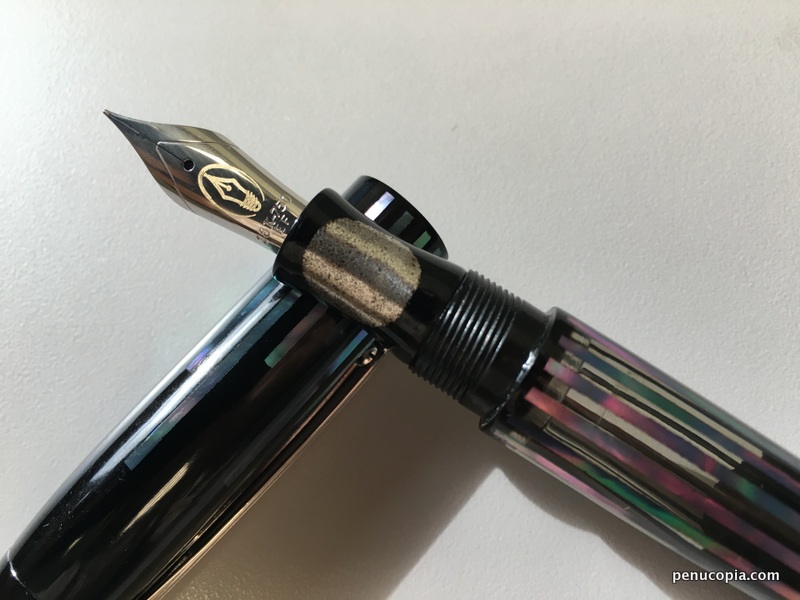 Hakumin Raden Pearl - section detail
This pen took longer than Ernest had anticipated, but having a clear area between strips of raden was something he had never done before. So we knew going into it that the timeline may be a bit off. I asked him now what he thought the timeline for something like this would be, and he said 12 - 16 months. Given that my pen didn’t start until the fall of 2014 and it was completed early into 2016, I think that seems about right, now that he has the technique down.
Cost for the pen will vary, so it’s best to contact Ernest to get a current quote. If you’re looking at pens such as the Pelikan M1000 Raden pens or a more raden-covered Nakaya (Ao Gai Zukushi, Decapod, etc.), you’re probably in the right price range. In discussing the pen with a pen friend, she called it “NSFW” (as in, pen porn). Maybe a more apt version is Not Safe for Wallet.
Would I do this again? Absolutely. Would I change anything about the design? No. And yes. If I had to do it over again, I would’ve left the whole barrel as a demonstrator, rather than go with an ink window. In the end, I am completely satisfied with this pen. It is a joy to behold. I love how it feels in the hand. It becomes invisible and just works when I’m writing with it. When I want to roll it around in my hand, I get to enjoy the magic of the raden and seeing the ink slosh around inside. So really, I wouldn’t change a thing.
If you are interested in reaching out to Ernest on a pen design, you can contact him via the information on his Hakumin Urushi Kobo website.
 Urushi Pens
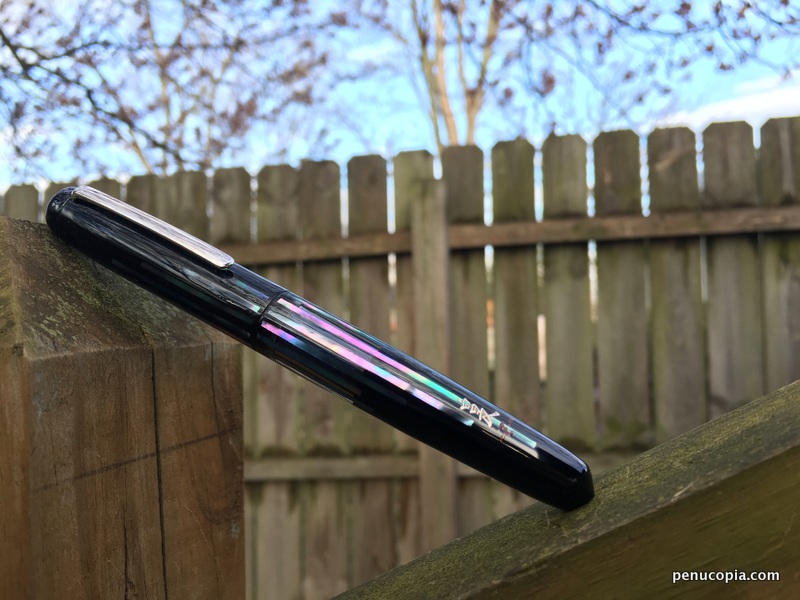 Hakumin Raden Pearl - Outdoors Perched
 Hakumin Raden Pearl - Outdoors in Wood
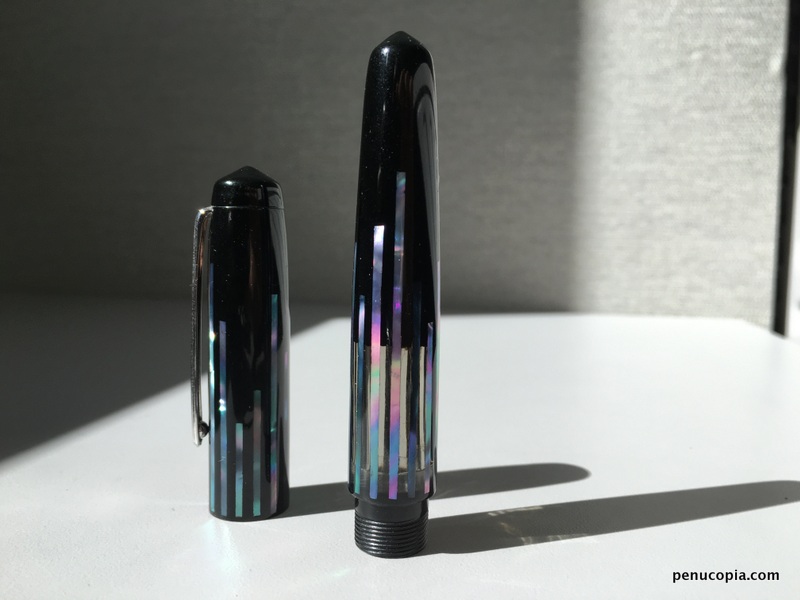 Hakumin Raden Pearl - Cap and Barrel in light
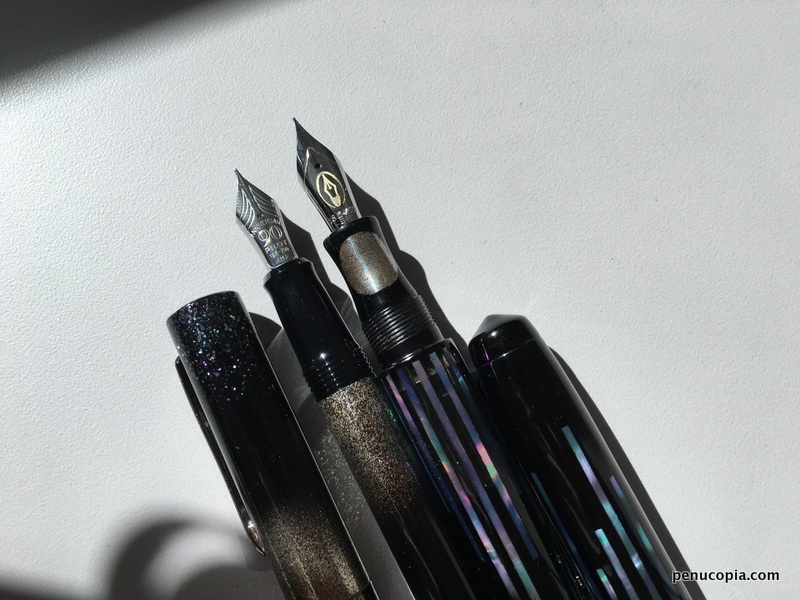
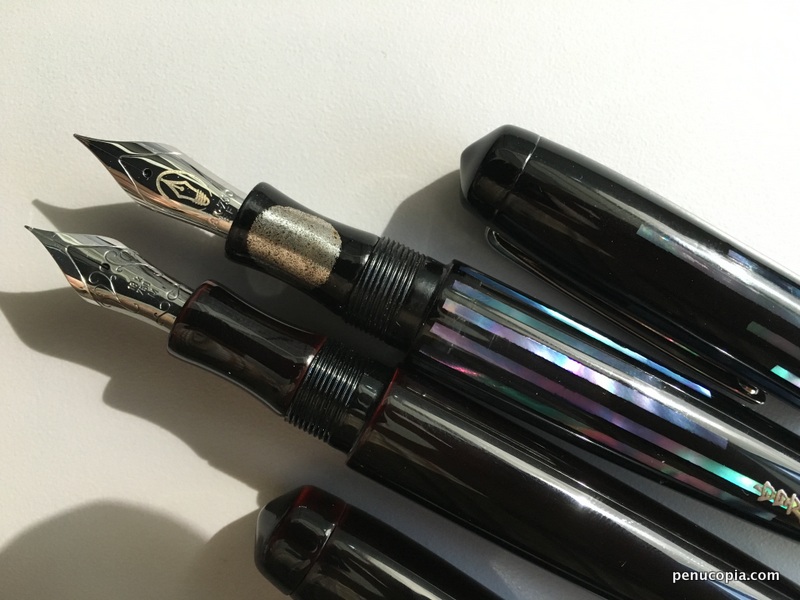 Hakumin Raden Pearl - section comparison with Kuro Tamenuri
 Hakumin Raden Pearl - signature highlight